To achieve the final result we shall practice and apply lots of transformations, Displacement Map, layer styles, actions and also dry brush smudge used to make amazing scattered effects and flying debris.
To implement successfully all steps of this tutorial, firstly we need to download the source image in high resolution from here.

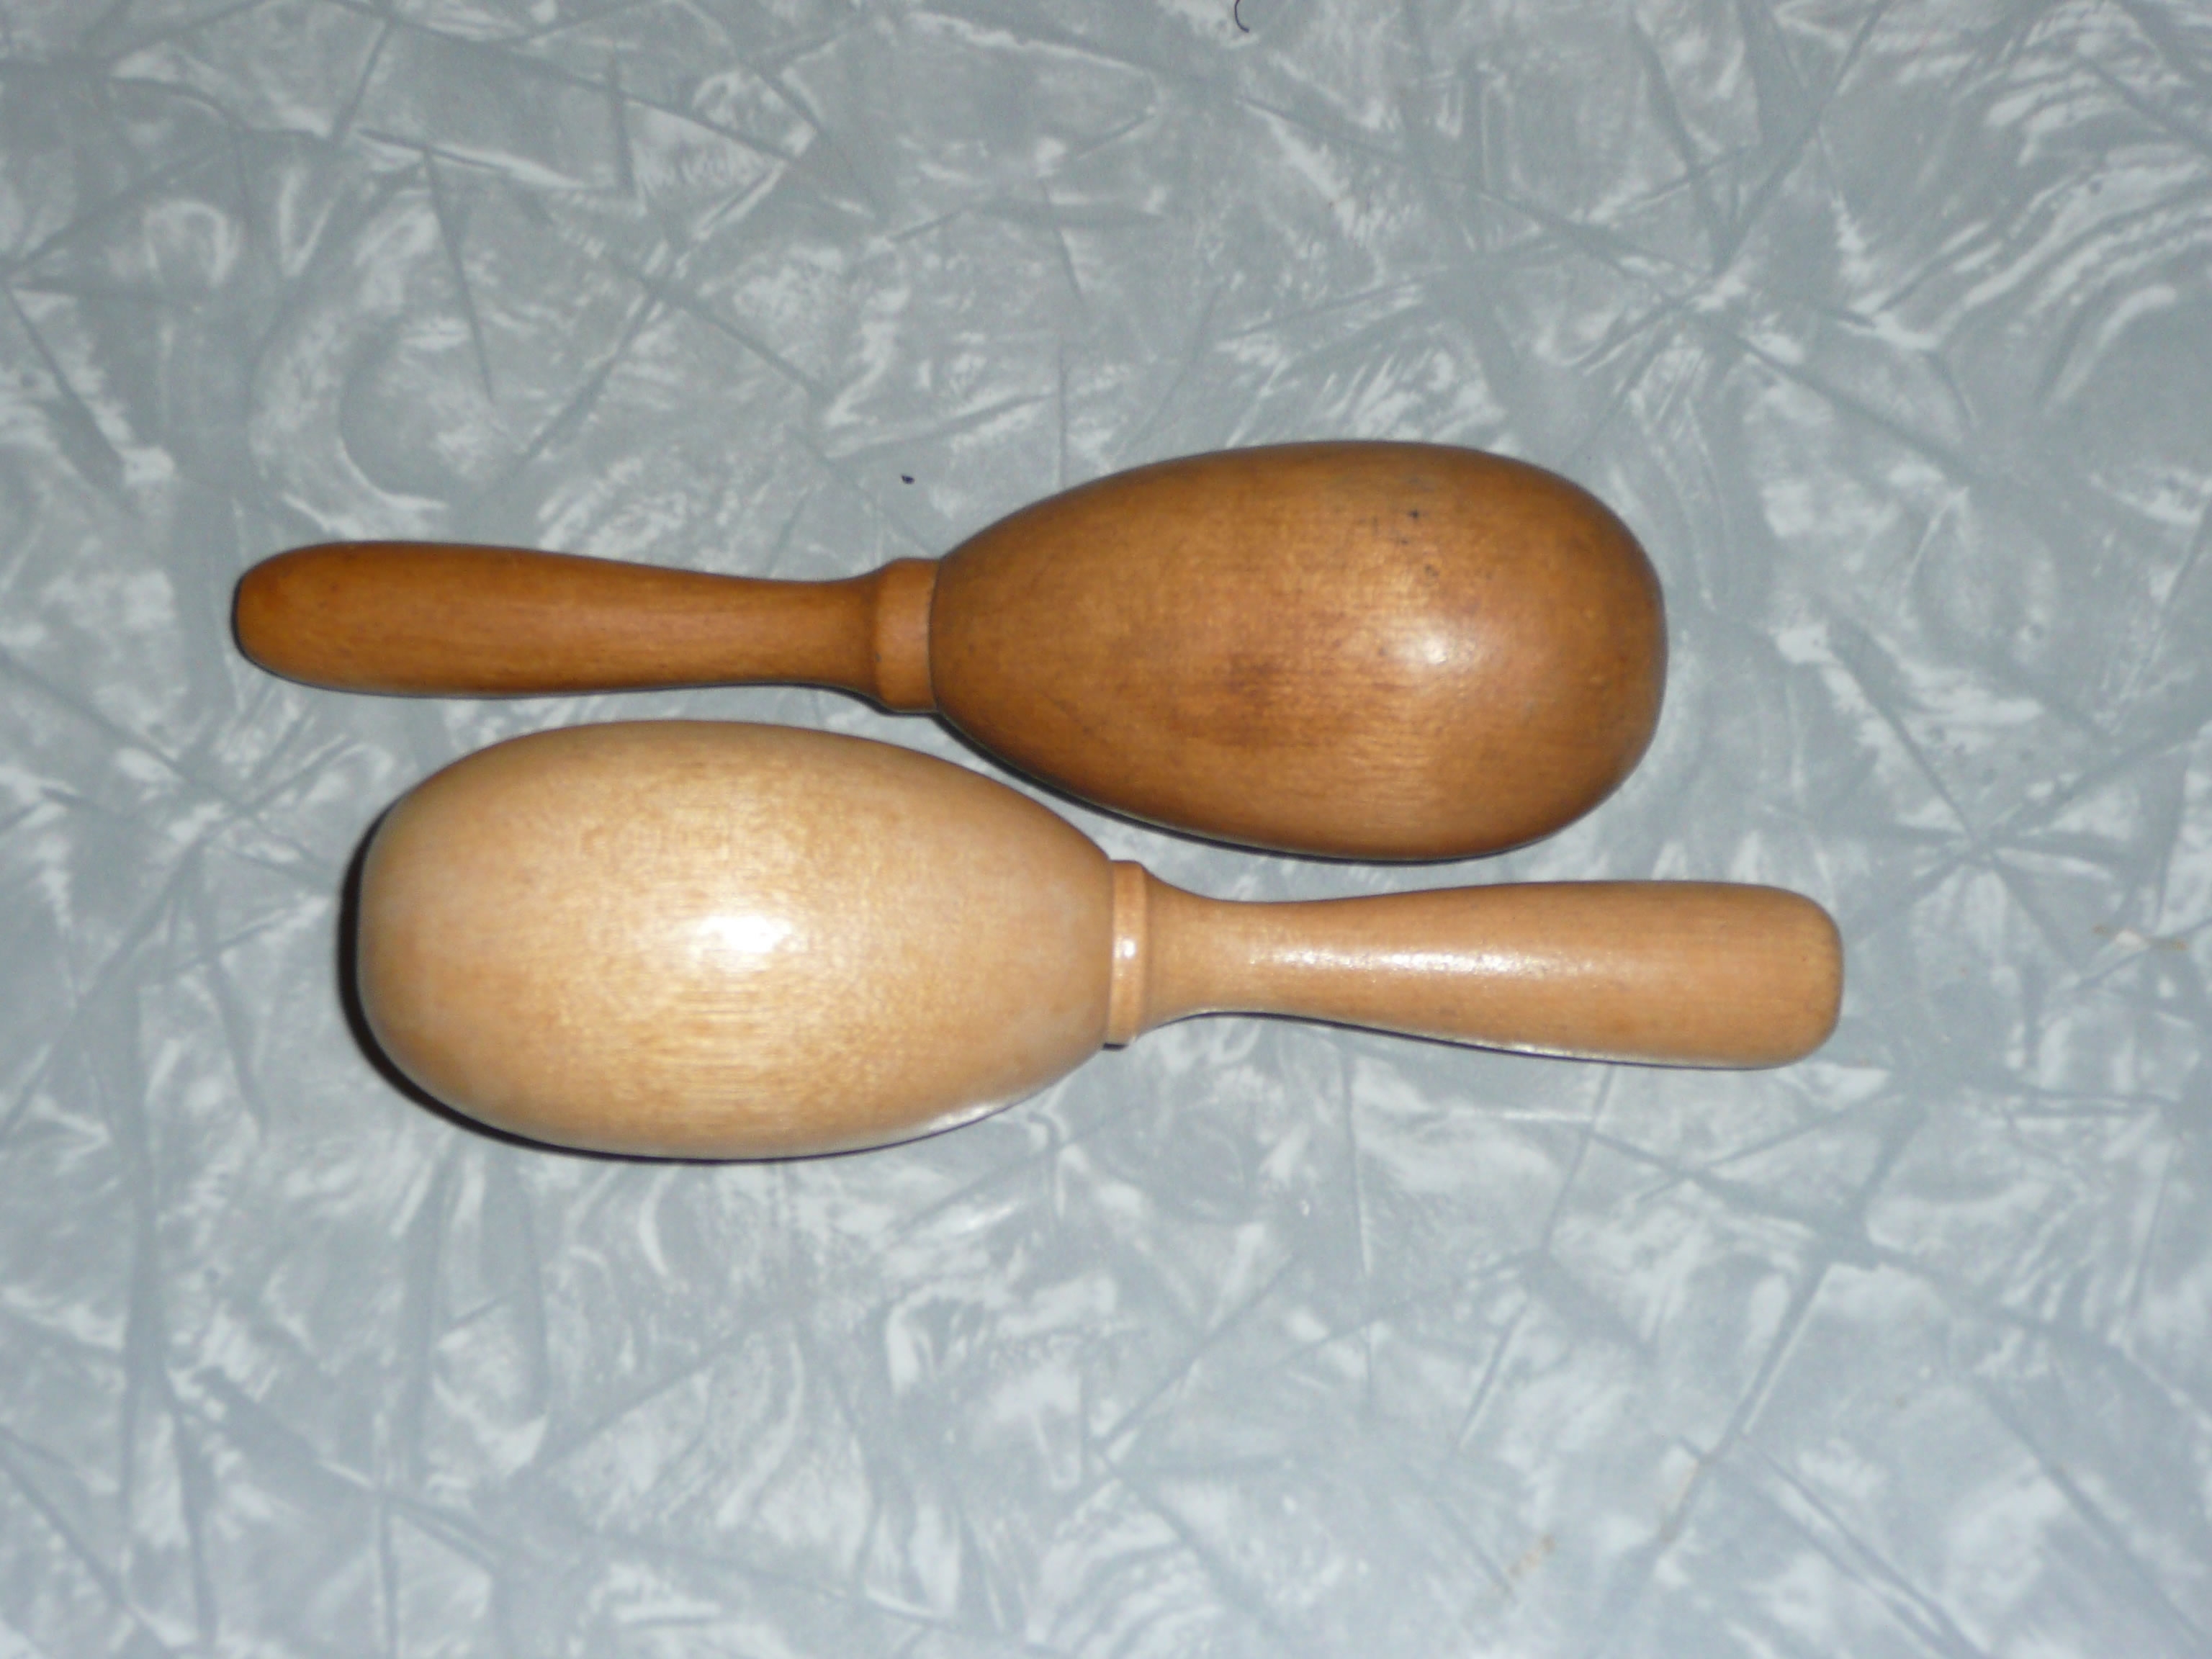
Step 1
Open the source image Wooden Malets. Click twice on the Background to turn it into an editable layer and switch it off for now as we won’t need the original source in the following steps.
Create a new layer on top of the Layers palette and change its name to Background Gradient.
Go to your Tool bar and change Foreground Color to # a4b3b8 and Background Color to # 899496.
Select Gradient Tool, choose Linear type, Foreground to Background gradient and draw it from bottom to top of the canvas.
While Background Gradient layer is selected, go to Layer, Group Layers and call the new group Background.

Step 2
Create a new layer called Light Spectrum and place it above Background Gradient layer in Background group.
Take Gradient Tool again, but this time choose radial Light Spectrum gradient. Draw it from bottom to top of the canvas and when ready, change the layer’s Blend Mode to Multiply.

Step 3
Take Lasso Tool and select random shapes from the background of the Wooden Mallets source photo. Arrange the selected portions to cover the background leaving a small distance between each of them. Merge all layers consisting selected portions of the mallets background and name the new layer Liquify as in the next step we are going to apply that filter. Place it above Light Spectrum layer.

Step 4
Whilst Liquify layer is selected, go to Filter menu and select Liquify. From Liquify tools select Turbulence tool, change its Brush Size to 66 and leave other settings by default. Start liquifying each ”tile” of the background but try to leave a little space between the tiles.

Step 5
Change Blend Mode of Liquify layer to Multiply and reduce Opacity to 59%. In order to give some relief to these liquified shapes, right click on their layer and Select Blending Options, Bevel and Emboss. Change the settings as follows:
Style: Inner Bevel
Technique: Smooth
Depth: 276%
Direction: Up
Size: 51px
Soften: 16px
Angle: 30 degrees
Use Global Light: checked
Altitude: 30 degrees
Gloss Contour: Linear
Anti-aliased: unchecked
Highlight Mode: Screen
Color: # d9c705
Opacity: 3%
Shadow Mode: Multiply
Color: #000000
Opacity: 9%

Step 6
Duplicate Liquify layer and keep its Bevel and Emboss style. Place the duplicate below Liquify layer and call it Liquify_Lens Blur. With the layer selected go to Filter, Blur, Lens Blur and only move the Radius slider to 30, leave all other settings by default.

Step 7
Create a new empty layer placed below Liquify_Lens Blur then highlight them both, right click and select Merge Layers. Thus you’ll apply the Bevel and Emboss. The only inconvenience is that you should again rename the new layer as Liquify_Lens Blur as it loses its name after the merge.
As you see on the following screenshot, you should have one Background group with four layers within- Background Gradient, Light Spectrum, Liquify_Lens Blur and Liquify.

No comments:
Post a Comment